Setting up a great podcast studio doesn’t have to mean spending a fortune on fancy furniture. Your podcast table is more than just a place to put your gear; it’s the command center for your show. Finding the right podcast table can really make a difference in how organized and professional your recording space feels. We’ll look at different types of tables, what features to look for, and even how to save money or go the DIY route to get the perfect podcast table for your needs.
Key Takeaways
-
When picking a podcast table, think about how much gear you have and how much space you’ve got. Bigger setups might need an L-shaped desk, while solo hosts might do fine with something smaller.
-
Comfort is key for long recording sessions. Make sure your podcast table allows for good posture and that your monitor is at eye level to avoid neck strain.
-
Cable management is super important for a clean look and to stop accidental unplugging. Grommets and ties can really help tidy up your podcast table.
-
You don’t need to spend a lot to get a good podcast table. Checking out used furniture sites or even building your own can save a lot of cash.
-
Once you have your podcast table, think about adding things like acoustic panels or better mic placement to make your recordings sound even better.
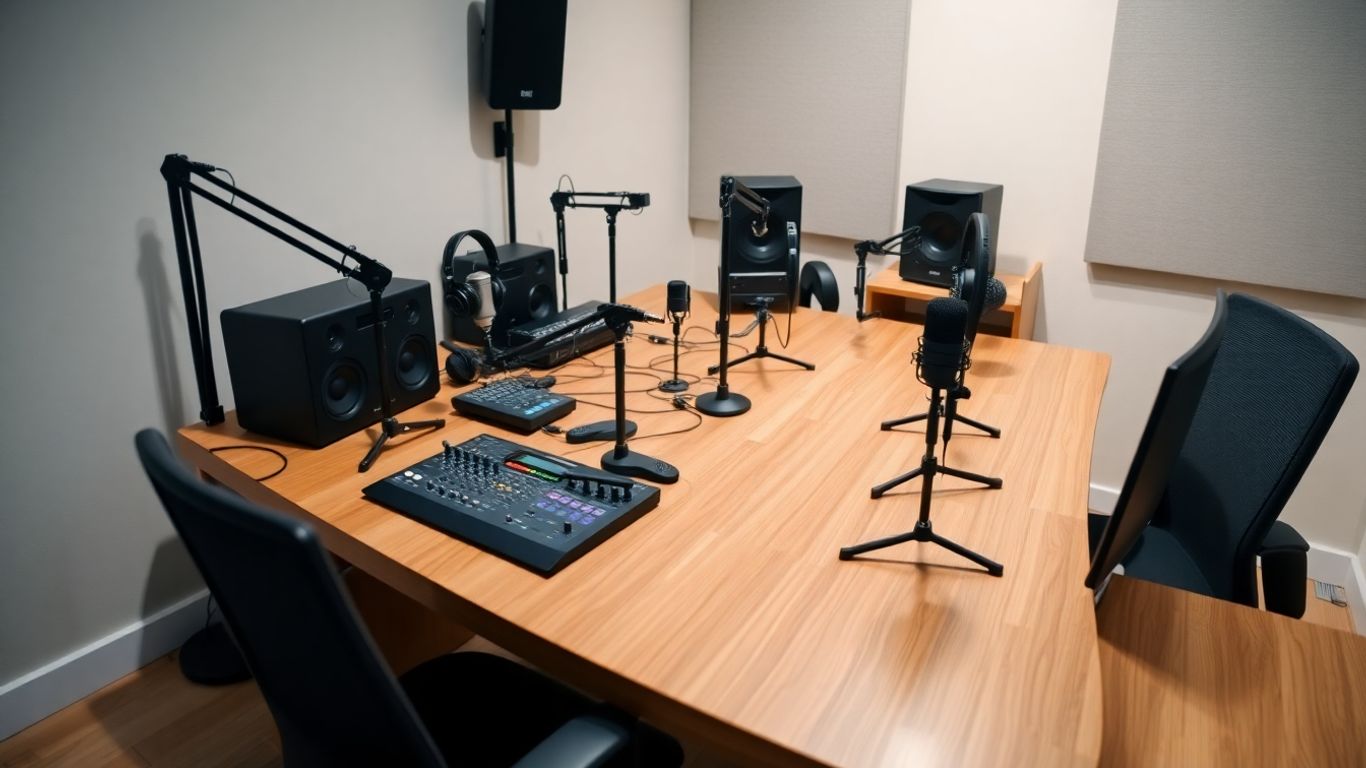
Choosing the Ideal Podcast Table

Selecting the right podcast table is a foundational step in creating a functional and professional studio setup. It’s more than just a surface to place your gear; it’s a central hub that influences your comfort, workflow, and even the overall aesthetic of your recording space. A well-chosen desk can make managing equipment easier and contribute to a more productive recording environment.
Not all podcasters have the same needs, and the type of desk you choose should reflect your specific recording style and space. Several common configurations cater to different requirements:
-
L-Shaped Desks: These are excellent for podcasters who use multiple monitors, mixers, or frequently host shows with several guests. The extended surface area allows you to spread out your equipment and keep everything within easy reach, preventing you from feeling cramped.
-
Adjustable Standing Desks: For those who spend long hours recording, an adjustable standing desk offers a great way to switch between sitting and standing. This can help reduce fatigue and maintain energy levels throughout extended sessions. Many models allow for smooth, quiet height adjustments.
-
Compact Desks: If you’re working with limited space, such as in a bedroom or a smaller apartment, a compact desk provides enough surface area for your essential gear without taking over the room. These can often be paired with vertical shelving to maximize storage.
-
Custom or DIY Desks: For unique needs or specific aesthetic goals, a custom-built or DIY desk allows for complete personalization. This approach lets you integrate features like built-in cable management, specific soundproofing elements, or modular sections tailored precisely to your workflow.
Before you even start looking at desks, take stock of what you have and what you plan to acquire. Consider the physical dimensions of your recording space. Measure the area where the desk will go, accounting for any other furniture or equipment you might have. Then, list all the gear you currently use or intend to use. This includes:
-
Microphones and boom arms
-
Audio interface or mixer
-
Computer or laptop
-
Headphones and headphone amplifier
-
Monitors (computer and/or audio)
-
External hard drives or storage
-
Any other accessories like pop filters or shock mounts
Think about how much surface area each item requires and how you want them arranged. A desk that looks good in a picture might not have enough depth or width for your specific setup. It’s also wise to anticipate future gear purchases. Choosing a desk with a bit of extra space can save you from needing to upgrade again soon.
Proper planning regarding your space and equipment needs will prevent common issues like a cluttered workspace or insufficient room for essential items. It’s better to overestimate your needs slightly than to find yourself outgrowing your desk too quickly.
Your comfort during recording sessions directly impacts your performance and the quality of your output. Ergonomics is key to avoiding strain and fatigue. When evaluating a podcast table, consider:
-
Desk Height: The standard desk height is typically between 28 to 30 inches. Your arms should rest comfortably at about a 90-degree angle when typing or operating your equipment. If you’re on the taller or shorter side, an adjustable height desk might be a worthwhile investment.
-
Monitor Placement: Position your computer monitor at eye level to prevent neck strain. Many desks have built-in monitor stands or allow for easy attachment of monitor arms.
-
Legroom: Ensure there’s ample space under the desk for your legs to move freely. Avoid desks with bulky drawers or supports that might impede your movement.
-
Surface Depth: A deeper desk allows you to place your monitor further back, reducing eye strain, and provides more space for equipment without feeling crowded. A depth of at least 24 inches is often recommended, with 30 inches being even better for more complex setups. You can find a variety of desks suitable for podcasting on Amazon.
Paying attention to these ergonomic factors will help you create a more sustainable and enjoyable podcasting workflow.
Exploring Podcast Table Styles
The right table can really tie your podcast studio together, making it both functional and visually appealing. Beyond just a flat surface, the style of your podcast table can influence workflow, acoustics, and the overall vibe of your recordings. Let’s look at some popular configurations and what makes them work.
The Versatility of L-Shaped Podcast Desks
L-shaped desks, often called corner desks, are a great choice for maximizing space, especially in rooms that aren’t perfectly square. They offer a generous amount of surface area, allowing you to spread out your equipment without feeling cramped. This configuration is particularly useful for podcasters who use multiple microphones, have a mixer, computer monitors, and perhaps even a small video setup. The extended surface can create distinct zones for different tasks – one side for audio gear, the other for computer work or guest interaction. This layout can significantly improve your workflow by keeping everything within easy reach.
The Benefits of Adjustable Standing Desks
For podcasters who spend long hours at their setup, an adjustable standing desk offers a significant health and productivity advantage. The ability to switch between sitting and standing throughout the day can reduce fatigue and improve focus. Many models are electric, allowing for smooth transitions with the push of a button. When choosing a standing desk for podcasting, look for models with a sturdy build that can support the weight of your equipment, including multiple microphones on boom arms and heavy monitors. Some even come with built-in cable management, which is a big plus.
Compact Solutions for Limited Spaces
If your recording space is on the smaller side, don’t worry – there are plenty of compact table solutions. Smaller desks, console-style tables, or even repurposed console tables can work well. The key is to be efficient with the space you have. Look for tables with built-in shelving or drawers to keep accessories organized and off the main surface. A simple, sturdy desk that can accommodate your primary microphone, headphones, and mixer is often all you need to get started. For instance, a simple office desk from Amazon can be a good starting point.
Custom and DIY Podcast Table Options
For those who want a truly unique setup or have very specific needs, custom or DIY tables are an excellent route. This allows you to tailor the size, shape, and features precisely to your studio. You can build a table from scratch using materials like plywood and MDF for a custom-built podcaster table. Alternatively, you can modify an existing piece of furniture. Many podcasters have found success by repurposing old conference tables or even sturdy dining tables. This approach often involves adding features like:
-
Drilling holes for cable management and microphone boom arms.
-
Installing power grommets or integrated power strips.
-
Adding acoustic dampening materials to the surface.
-
Painting or covering the table for a professional look.
This method not only provides a personalized workspace but can also be a very cost-effective way to achieve a professional studio setup.
Essential Features for Your Podcast Table
When setting up your podcasting space, the table itself is more than just a surface; it’s the central hub for your gear and workflow. Focusing on a few key features can make a significant difference in your recording experience and the overall professionalism of your setup.
Effective Cable Management Strategies
Cables are an inevitable part of any audio setup, but they don’t have to be a constant source of clutter or frustration. Good cable management keeps your workspace tidy, prevents accidental disconnections during recording, and contributes to a cleaner aesthetic.
Consider these methods for taming your cables:
-
Grommets: Installing desk grommets, typically 2-3 inches in diameter, allows you to pass cables discreetly through the tabletop. This is especially useful for routing microphone boom arms, power cords, and audio interface connections.
-
Cable Trays and Sleeves: Underneath the desk, cable trays or sleeves can hold power strips, excess cable length, and power bricks, keeping them off the floor and out of sight.
-
Velcro Straps or Zip Ties: For bundling cables together, Velcro straps are reusable and easy to adjust, while zip ties offer a more permanent solution for securing bundles of wires.
Proper cable management isn’t just about looks; it’s about creating a reliable and safe environment where your equipment functions without interference or accidental unplugging.
Integrating Power and Connectivity
Having easy access to power and connectivity is vital for keeping your equipment running and your workflow smooth. Think about how many devices you’ll need to plug in and where you’ll need access.
-
Built-in Power Grommets: Some desks come with integrated power outlets and USB ports, offering a clean way to power your devices directly from the tabletop.
-
Surge Protectors: A good surge protector is a must to safeguard your valuable audio equipment from power fluctuations. Consider one with enough outlets for all your gear, including potential future additions.
-
USB Hubs: If your interface or computer doesn’t have enough USB ports, a powered USB hub can provide the necessary connections for microphones, headphones, and other peripherals.
Material Considerations for Sound Quality
While the primary role of a table is functional, the material it’s made from can subtly influence your recording environment. Dense, solid materials are generally preferred as they are less likely to vibrate or resonate, which could introduce unwanted noise into your recordings.
-
Solid Wood: Offers good density and a classic look. It can also be modified more easily for custom mounts or cable routing.
-
MDF or Particle Board: These are common in many furniture pieces. While more affordable, they can be less dense and may require additional sound dampening if resonance becomes an issue.
-
Metal: Can be very sturdy but might be more prone to transmitting vibrations if not properly designed or isolated.
When choosing, consider the overall stability of the desk and how it might interact with your microphones, especially if you use boom arms that attach directly to the surface.
Budget-Friendly Podcast Table Acquisition
Starting a podcast doesn’t require a massive investment in studio furniture. You can create a functional and professional-looking setup without spending a fortune. The key is to be resourceful and consider options beyond brand-new, high-end desks.
Leveraging Second-Hand Marketplaces
One of the most effective ways to save money on a podcast table is to explore the second-hand market. Platforms like Facebook Marketplace, Craigslist, and even local garage sales can yield fantastic finds. Look for sturdy tables, such as old conference tables or solid wood dining tables. These often have the durability needed for mounting equipment and can be refinished or covered to match your studio’s aesthetic. A used conference table can often be found for under $50, providing a large, stable surface to work with. Don’t overlook the ‘free’ sections; sometimes, perfectly good tables are given away simply because people are redecorating.
Affordable New Table Options
If the second-hand market isn’t yielding results, or you prefer something new, there are still budget-friendly options available. Many online retailers offer basic office desks or computer tables that can serve well as podcasting stations. Look for desks with solid tops, as these are easier to modify for cable management or to attach microphone boom arms. An L-shaped desk can also be a good choice if you need more surface area for multiple hosts or equipment, and some affordable models include built-in shelving for added storage.
DIY Customization for Cost Savings
For those with a bit of a creative streak, a DIY approach can offer significant savings and a truly custom setup. You can take a basic, inexpensive table and add features to make it podcast-ready. Consider drilling holes for desk grommets to neatly route cables, or install a power grommet to keep all your devices powered and organized. Even simple additions like adhesive cable clips or velcro ties can make a big difference in keeping your workspace tidy. For a different look, you could cover a used table with a durable tablecloth or even attach wood planks for a unique finish. This approach allows you to tailor the table precisely to your needs and budget, turning an ordinary piece of furniture into a specialized podcasting hub. For those starting out, understanding basic studio setup can be helpful, and there are resources available to guide you through the initial stages.
Enhancing Your Podcast Table Setup
Once you have your podcast table in place, there are several ways to refine your setup for better functionality and a more professional look. Small adjustments can make a big difference in your recording environment and overall workflow.
Optimizing Microphone Placement
Proper microphone placement is key to capturing clear audio. Consider how your microphones are positioned relative to each speaker. For multiple hosts, arranging microphones in a semi-circle or a straight line facing inwards can help minimize bleed between channels. Using boom arms attached to the table can offer flexibility, allowing you to position microphones precisely without taking up valuable desk space. Experiment with the distance between the microphone and the speaker’s mouth; typically, a few inches is ideal for most dynamic microphones to avoid plosives while capturing a full sound. For a more structured approach, you might consider a simple diagram:
|
Microphone Position |
Ideal Distance from Mouth |
|---|---|
|
Dynamic Mic |
3-6 inches |
|
Condenser Mic |
6-10 inches |
Incorporating Acoustic Treatments
While your table is a central piece, the acoustics of your room play a significant role. Even with a great table, reflections from hard surfaces can cause echo and reverb in your recordings. Simple acoustic treatments can be integrated around your podcast table. Consider using portable acoustic panels that can be clamped to the table or mounted on stands behind and to the sides of the microphones. Even thick blankets or heavy curtains placed strategically can help absorb sound. A DIY approach might involve using foam panels or even strategically placed bookshelves filled with books to break up sound waves. The goal is to reduce unwanted reflections without making the space sound too dead.
Selecting Complementary Studio Furniture
Your podcast table is the core, but other furniture can support your setup. Think about seating that is comfortable for long recording sessions and doesn’t produce unwanted noise (like squeaky chairs). If you have a lot of gear, consider adding a small, sturdy shelving unit or a credenza nearby to keep mixers, audio interfaces, and other equipment organized and within reach. This keeps your main podcast table clear for microphones and hosts. For a more polished look, ensure any additional furniture complements the style of your podcast table. A well-rounded studio setup often includes:
-
Comfortable, non-swiveling chairs
-
A small side table or cart for extra gear
-
A dedicated space for recording equipment
Making thoughtful choices about how you arrange your space and what accessories you add can significantly improve the quality of your podcast and the comfort of your recording sessions. It’s about creating an environment that is both functional and conducive to good audio capture. Consider looking at podcast desk ideas for inspiration on how to arrange your entire space.
Make your podcast sound even better by setting up your table right. Getting your gear in place can really boost your show’s quality. Want to learn more about creating a great podcast space? Visit our website for tips and tricks!
Final Thoughts on Your Podcast Table
So, picking the right table for your podcasting setup really matters. It’s not just about having a place to put your gear; it’s about making your recording space work for you. Whether you go for a big L-shaped desk to spread out, a standing desk for comfort, or a smaller, budget-friendly option, the goal is to create a functional and organized environment. Don’t forget about managing those cables – it makes a huge difference in how professional your setup looks and sounds. Even simple DIY touches can turn an ordinary table into a dedicated podcasting hub. With the right table and a bit of thoughtful arrangement, you’ll be well on your way to smoother recordings and a more enjoyable creative process.
Frequently Asked Questions
What makes a good table for podcasting?
A great podcast table gives you enough room for your gear like microphones and computers, and helps you keep things tidy. It should be strong, have ways to hide wires, and maybe some storage space to keep your recording area neat.
How do I set up a podcast table at home?
First, pick a desk that fits your space. Put your microphone where it’s easy to reach, about an arm’s length away. Your screen should be at eye level to avoid neck pain. Adding things to manage cables and panels to help with sound can make it even better.
Do I really need a special desk for podcasting?
Not always! A regular desk can work fine. But, desks made for podcasting often have more space, are more comfortable to use for long periods, and sometimes include built-in storage, which makes recording much smoother.
What are some table ideas for small podcasting spaces?
If you don’t have much room, try a small L-shaped desk, a table that folds up, or even a desk attached to the wall. Using shelf risers on your desk can also help you use the space upwards.
How can I make my podcast table setup the best it can be?
To create the best setup, think about comfort, storage, and how to make your sound better. Desks that let you change from sitting to standing are good for long sessions. Storage helps keep your equipment organized and stops distractions. Adding sound-absorbing materials is also key.
How big should my podcast table be?
The size you need depends on how much equipment you have. If you just need space for a laptop and a mic, a smaller desk works. But if you have multiple people or mixers, you’ll need a bigger desk, maybe an L-shape, to fit everything.